|
|
|
|
|
Linux Training 1825 Monetary Lane Suite #104 Carrollton, TX Do a presentation at NTLUG. What is the Linux Installation Project? Real companies using Linux! Not just for business anymore. Providing ready to run platforms on Linux |
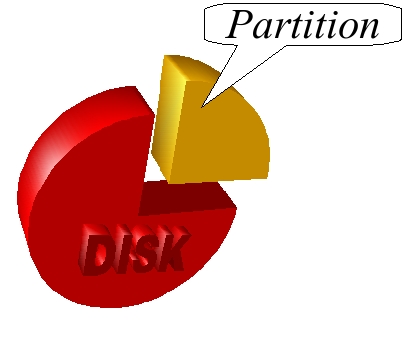 On this page... (hide) Logical Volume Manager - LVMPartitions, Slices and FrustrationWhen you think about storage, generally we think of things like disks, driver letters, filesystems and partitions. Typically a disk is broken up into areas called partitions (or slices) and each partition can be dedicated to some kind of storage purpose such as holding a fileystem or swap area. While this is easy and straight forward for most, it can be very frustrating when a partition is out of space or you want to reorganize data or even replace a hard drive. Partitioning usually means setting the beginning and ending points on a hard drive for an area of storage. This can cause issues since usually partitions are placed one after the other on the hard drive. Why is this a problem? Consider a drive with two partitions. If you wanted to expand the first partition somehow, you are probably looking at destroying the following partition to accomplish the task. Did you know... Sun Solaris 8 could only handle disks up to 1TB in size! Even in Solaris 9, handling disks larger than 1TB required using a different partition label which caused some packages to break. Solaris 8 is still one of the most widely deployed versions of Solaris. Large disk and partition handling is not a problem that is unique to Linux. In fact, Linux distributions were solving the problem before many commercial Unix's did. Another problems with partitions is that the old style DOS partition table is alive and well for most computer users. This means that you only have 4 primary partitions. Fortunately, there is already a standard for taking a primary partition and turning it into an extended partition which can contain more partitions. Even so, you are limited to maximum number of partitions which could be as few as 15 (e.g. SCSI). Maximum size of a partition is usually limited to 2TB. While this seems like a lot of storage, with newer disk technologies becoming so affordable, large multi-terabyte storage has already invaded corporate America and the pricing makes is practical for home use as well. To solve the problem, there are multiple standards for an updated partition table (e.g. GPT/GUID). However, many systems will not know what to do with the different partition table and might not be able to boot off it. Moving data (e.g. filesystems) around from partition to partition, disk to disk, can be a time consuming task which requires a temporary storage area (e.g. tape backup or other disk) to aid with the task. Partitions are essentially statically defined areas of a disk that are used for storage. Because of their static nature they do not lend themselves well to the rapid changing environment of today's enterprise businesses. RAIDUsing a Redundant Array of Independent Disks can be a somewhat flexible solution for storage. Some standalone hardware subsystems can present volumes of data to devices and in some cases can avoid some of the problems with partitioning. However, in general, RAID only makes the problem worse since disks become larger and limitations with common partition tables prevent the creation of large areas for use as filesystem space. SANStorage Area Networks also provide flexibility in enterprise storage. With disk storage on a SAN, new volumes of storage can be made available dynamically. This allows a machine with visibility to a newly created storage area to use that area without necessarily rebooting. A problem can occur when making new drives visible dynamically in that the device names that a client host might use could change as new disks come in and out of view. Some planning is required to use persistent device names (where supported) in order to enjoy the flexibility of SAN storage. However, while it provides a means for isolating storage visibility and provides the idea of dynamically adding storage to devices, SAN disk units do not solve the fundamental problems of current partitioning technologies. Old Style Linux StorageOn a Linux host, disks are given device names like /dev/hda, /dev/hdb or /dev/sda, /dev/sdb, /dev/sdc... The problem with using such device names is that the order of the devices may change depending on how disks are connected to their bus. For example, if we have a machine with two SCSI drives, Linux will identify the two drives as /dev/sda and /dev/sdb. But, if we add additional disks, depending on where (which SCSI id) they are placed inside of the SCSI bus or what controller is used, the naming of devices may change, forcing potentially an emergency repair situation in order make things right. DISK1 ------> /dev/sda
DISK2 ------> /dev/sdb
DISK1 -------> /dev/sda
NEW DISK ----> /dev/sdb
DISK2 -------> /dev/sdc
Red Hat combated this problem at the filesystem level by creating a special option on the ext2 filesystem called a LABEL. You can set the LABEL when a filesystem is created or with a tool after creation. Thus in your /etc/fstab, instead of using the device name (which may change), you used the LABEL= feature to allow searching for the filesystem that matches the label requested. However, this feature was limited to ext2 at the time. The solution is on the right path though. There needs to be a way of abstracting the device (filesystem) so that dynamic changes can be handled without a lot of repair work. Example /etc/fstab entry using LABEL=: LABEL=/ / ext3 defaults 1 1 Better Linux StorageIn newer versions of Linux (somewhere early in 2.6), persistent names became available for storage devices. You can find the names under /dev/disk (by-id, by-path or by-uuid). This means we can replace the not so static device names in /etc/fstab with persistent names. Example /etc/fstab entry using persistent partition name: /dev/disk/by-id/ata-Maxtor_6B300R0_BZZ1155-part1 / ext3 defaults 1 1 This is better than using LABEL= since no filesystem feature is needed. Thus any filesystem can be mounted this way and not worry about LABEL= support or changes to actual device names. If you are working with SANs or just in general, using persistent names can prevent you from having to do additional work if you are adding and/or subtracting drives to your system. Even so, not ALL storage devices are known by the standard Linux drivers (e.g. proprietary storage controllers) and therefore, there is no guarantee that you can use persistent storage device names in every situation. Even Better Linux Storage (LVM)In the late 1990's, there was a considerable difference between Red Hat and SuSE. SuSE was trying very hard to provide a Unix-like world for their customer base. This would help ease migration from commercial Unix platforms like HPUX, AIX and Solaris. A new filesystem brought journaling to Linux. That filesystem was reiserfs. SuSE began delivering reiserfs (beta) with version 6.3 of their product. SuSE also was looking at Sistina's LVM (Logical Volume Manager). SuSE decided to included reiserfs and LVM as a part of their distribution. This provided the first enterprise level storage management in Linux. With that said, Alan Cox (Red Hat) was credited with the effort of getting LVM into the mainline kernel tree. LVM is used by almost all Linux distributions today including both SUSE Linux Enterprise Server (since SLES 7 2001) and Red Hat Enterprise Linux (since RHEL 3 2003). Are You Kidding?? Ironically, it was not Novell/SUSE that acquired Sistina, but Red Hat. This was good news for Red Hat since they were still rather new to the idea of flexible storage solutions using LVM. Even so, the SUSE team has been using it for a much longer period of time (3 years longer) and unlike Red Hat, they used it in combination with a filesystem (reiserfs) that worked dynamically in conjunction with it. As both Red Hat and SUSE begin delivering enterprise level distributions with longer support, SUSE's inclusion of LVM early on made SUSE a better fit for the enterprise, even though Red Hat (due to IPO exuberance) became synonymous with Linux in the USA. Using LVM, device names become irrelevant. Once a partition OR whole disk is placed under LVM control, the management of storage areas is handled in an abstract manner without using fixed device names. So finally, we have a fairly generic abstraction mechanism that allows us to access storage with persistent names in almost all cases. So, even though things like /dev/disk persistent device naming came AFTER LVM, LVM is actually the better solution in most storage cases and SUSE has been using it since 1999! Physical VolumesAn LVM Physical Volume is a disk or partition that can be used by LVM. This is the lowest level of LVM association. To make a disk or partition usable by LVM you use the # pvcreate /dev/sdb /dev/sdd1 You can place any valid block storage device under LVM control. This includes whole disks, partitions, multi-disk (software RAID) devices. For some strange reason, Red Hat believes that using whole disks as PVs is dangerous because you might plug the disk into a system that does not understand LVM and it may allocate and write over the top of it. However, the benefits of using the whole disk far outweigh the potential of data corruption caused by doing something that could only be classified as bizarre (if not insane). To locate all PVs on a system use the # pvscan PV /dev/sda5 VG leviathan lvm2 [200.00 GB / 65.00 GB free] PV /dev/sdb lvm2 [250.00 GB] PV /dev/sdd1 lvm2 [200.00 GB] Total: 3 [650.00 GB] / in use: 1 [200.00 GB] / in no VG: 2 [450.00 GB] Specifics about a particular PV can be viewed using the # pvdisplay /dev/sdd1 --- NEW Physical volume --- PV Name /dev/sdd1 VG Name PV Size 200.00 GB Allocatable NO PE Size (KByte) 0 Total PE 0 Free PE 0 Allocated PE 0 PV UUID NkQa7Z-eFM0-vke6-3Z3g-DsP1-R5dM-QUjBsL A newer utility called # pvs --separator , --noheadings
/dev/sda5,leviathan,lvm2,a-,200.00G,65.00G
/dev/sdb,,lvm2,--,250.00G,250.00G
/dev/sdd1,,lvm2,--,200.00G,200.00G
# pvs -v
Scanning for physical volume names
Wiping cache of LVM-capable devices
PV VG Fmt Attr PSize PFree DevSize PV UUID
/dev/sda5 leviathan lvm2 a- 200.00G 65.00G 200.01G 04sZ5x-bYq8-...
/dev/sdb lvm2 -- 250.00G 250.00G 250.00G rmn0f0-s9ln-...
/dev/sdd1 lvm2 -- 200.00G 200.00G 200.00G NkQa7Z-eFM0-...
Some distributions have special utilities to work with LVM. The openSUSE distribution has YaST. Please note that these special administration utilities have limitations. For example, SUSE's YaST does not understand how to put a full disk under LVM control. That is a huge limitation given the partitioning conundrum discussed here. Accept Sistina's LVM command set in Linux is patterned after the Logical Volume Manager found in HP-UX. In general Sistina's LVM is a superset of what HP used. However it does differ slightly. But in general, if you learn the command line syntax for manipulating LVM in Linux, you are well prepared to handle LVM's in HP-UX. Volume GroupsAn LVM Volume Group (VG) establishes a named pool of PVs that can be used like a logical disk. # vgcreate mytestvg /dev/sdb /dev/sdd1 Just like PVs, we can use  # vgs VG #PV #LV #SN Attr VSize VFree leviathan 1 3 0 wz--n- 200.00G 65.00G mytestvg 2 0 0 wz--n- 449.99G 449.99G If you need to add additional PV's to an exiting VG, you can use # pvcreate /dev/sdc # vgextend mytestvg /dev/sdc Volume group "mytestvg" successfully extended
Logical Volumes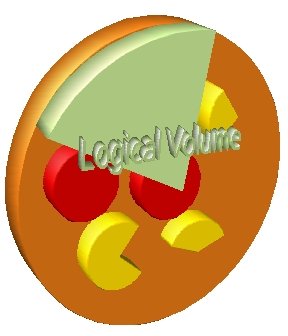 An LVM Logical Volume (LV) is the equivalent of a partition in the old vernacular. LVs are created inside of a VG and usually an LV is what you will format with a filesystem for mounting. Similar to PVs and VGs, there is a For example to create a new LV called "lv1" with a 10G size out of the mytestvg VG: # lvcreate -n lv1 -L 10G mytestvg Logical volume "lv1" created Also, just like the other elements of LVM, there is a # lvs LV VG Attr LSize Origin Snap% Move Log Copy% isos leviathan -wi-ao 35.00G localhome leviathan -wi-ao 40.00G vmware leviathan -wi-ao 60.00G lv1 mytestvg -wi-a- 10.00G Again, typically you would create a filesystem on a newly created LV. # mkfs.ext3 /dev/mytestvg/lv1
mke2fs 1.39 (29-May-2006)
Filesystem label=
OS type: Linux
Block size=4096 (log=2)
Fragment size=4096 (log=2)
1310720 inodes, 2621440 blocks
131072 blocks (5.00%) reserved for the super user
First data block=0
Maximum filesystem blocks=2684354560
80 block groups
32768 blocks per group, 32768 fragments per group
16384 inodes per group
Superblock backups stored on blocks:
32768, 98304, 163840, 229376, 294912, 819200, 884736, 1605632
Writing inode tables: done
Creating journal (32768 blocks): done
Writing superblocks and filesystem accounting information: done
This filesystem will be automatically checked every 39 mounts or
180 days, whichever comes first. Use tune2fs -c or -i to override.
Then you can create a normal mount point directory and add the following to your /dev/mytestvg/lv1 /lv1 ext3 acl,user_xattr 1 2 # mkdir /lv1
# mount /lv1
# df -h /lv1
Filesystem Size Used Avail Use% Mounted on
/dev/mapper/mytestvg-lv1
9.9G 151M 9.2G 2% /lv1
In LVM2 (second version of LVM in Linux), LVM2 makes use of something called the Device Mapper. This is why when we do the Resizing Logical Volumes and FilesystemsIn addition to getting around maximum parition size, LVM is useful for creating areas of storage that can easily be resized. LVs can be grown or reduced. If you grow an LV, you can later grow the underlying filesystem to fill it. If you want to reduce an LV size, you must first shrink the filesystem and then you can reduce the LV. Just make sure to shrink the filesystem by a little bit more than you will shrink the LV. After all, you can fill the gap by expanding the filesystem to fill that later. An LV can be extended using # lvextend -L +10G /dev/mytestvg/lv1 Extending logical volume lv1 to 20.00 GB Logical volume lv1 successfully resized Once an LV has been grown in size, you will have to somehow tell the filesystem to make use of the additional space. Just growing an LV does not make the storage available for files and directories. Resizing Ext3The program to resize the ext3 (or ext2) filesystem is # lvextend -L +10G /dev/mytestvg/lv1 Extending logical volume lv1 to 20.00 GB Logical volume lv1 successfully resized # resize2fs /dev/mytestvg/lv1 resize2fs 1.39 (29-May-2006) Filesystem at /dev/mytestvg/lv1 is mounted on /lv1; on-line resizing required Performing an on-line resize of /dev/mytestvg/lv1 to 5242880 (4k) blocks. The filesystem on /dev/mytestvg/lv1 is now 5242880 blocks long. Took about 9 seconds. Not bad. The question is, will it take longer if we increase the amount of growth? # lvextend -L +50G /dev/mytestvg/lv1 Extending logical volume lv1 to 70.00 GB Logical volume lv1 successfully resized # resize2fs /dev/mytestvg/lv1 resize2fs 1.39 (29-May-2006) Filesystem at /dev/mytestvg/lv1 is mounted on /lv1; on-line resizing required Performing an on-line resize of /dev/mytestvg/lv1 to 18350080 (4k) blocks. The filesystem on /dev/mytestvg/lv1 is now 18350080 blocks long. Took about 40 seconds. Why is the amount of time important? Consider the case where a program is generating logging data at a rapid pace. For example, you notice that you will exhaust your filesystem space is about 30 seconds. Depending on the amount of space needed, the time to complete the task can be critical. In the example above, you will not be able to resize the area fast enough. Also, note that an older ext3 filesystem may have great difficulty in being grown. The author of Resizing ReiserfsReiserfs is often considered the more controversial filesystem (when compared to ext3). However, reiserfs has always been easier to resize and had this feature before ext3 even existed. One key advantage to reiserfs resizing is that the operation is almost instantaneous, even for fairly large size resizing. This can be a differentiator depending on your data storage needs. For reiserfs, you use the # lvextend -L +50G /dev/mytestvg/lv1 Extending logical volume lv1 to 70.00 GB Logical volume lv1 successfully resized # resize_reiserfs /dev/mytestvg/lv1 resize_reiserfs 3.6.19 (2003 www.namesys.com) resize_reiserfs: On-line resizing finished successfully. Took 2 seconds to resize the reiserfs area vs. 40 seconds for ext3. Just something to bear in mind. SnapshotsSometimes you need a filesystem to remain static (read-only) for purposes like doing a backup of the filesystem. The reason is that modifications to the filesystem while a backup is taking place could create some inconsistencies on a restore. However, keeping everyone off of a filesystem is very inconvenient. This is where snapshots come to the rescue. A snapshot is a static image of a filesystem in time. Modifications to the actual filesystem will not affect the snapshot image. For all practical purposes though, the snapshot looks like a filesystem. A snapshot is a special form of Logical Volume. You use # lvcreate -L 30G -s -n lv1-snap /dev/mytestvg/lv1 Logical volume "lv1-snap" created Assuming our # mkdir /lv1-snap # mount /dev/mytestvg/lv1-snap /lv1-snap # ls /lv1-snap file1.txt file2.txt # ls /lv1 file1.txt file2.txt You can see that the two mounted areas look the same currently. But if we make some changes to the filesystem at # touch /lv1/file3.txt # rm /lv1/file1.txt # ls /lv1 file2.txt file3.txt # ls /lv1-snap file1.txt file2.txt A snapshot only holds the data of the differences between it and the original LV. And, just to confuse things more, you CAN manipulate the snapshot volume as well. You need to remember that a snapshot needs to have enough space to hold the differences. But, since a snapshot is just a special LV, it can be extended using How much space should you allocate to a snapshot LV? Depends. It depends on how long the snapshot is going to be around. For example, if you know that on a weekly basis a particular filesystem has data changes amounting to less than 30%, then you guess that your snapshot size should be roughly 30% of the original LV. But if for some reason you need the snapshot longer than one week, you could well run out of space on the snapshot LV. Snapshots are usually done for the purpose of making a backup. Once the backup is complete, the snapshot LV can be destroyed. You can destroy the snapshot LV with # umount /lv1-snap # lvremove /dev/mytestvg/lv1-snap Do you really want to remove active logical volume "lv1-snap"? [y/n]: y Logical volume "lv1-snap" successfully removed Moving Stuff AroundUsing LVM allows you the flexibility of moving VG's from system to system as well as removing PV's from a VG. Moving Data Off of a PVOne huge benefit of the abstraction of LVM is that you can move data off of a PV so that it can be removed safely. For example, if you know that you have a drive that is failing, you can use In the example below, notice that only # pvscan PV /dev/sdb VG mytestvg lvm2 [250.00 GB / 180.00 GB free] PV /dev/sdd1 VG mytestvg lvm2 [200.00 GB / 200.00 GB free] PV /dev/sda5 VG leviathan lvm2 [200.00 GB / 65.00 GB free] Total: 3 [650.00 GB] / in use: 3 [650.00 GB] / in no VG: 0 [0 ] But if # pvmove -v /dev/sdb
Wiping cache of LVM-capable devices
Finding volume group "mytestvg"
Archiving volume group "mytestvg" metadata (seqno 34).
Creating logical volume pvmove0
Executing: /sbin/modprobe dm-mirror
Moving 17920 extents of logical volume mytestvg/lv1
Found volume group "mytestvg"
Updating volume group metadata
Creating volume group backup "/etc/lvm/backup/mytestvg" (seqno 35).
Found volume group "mytestvg"
Found volume group "mytestvg"
Suspending mytestvg-lv1 (253:0)
Found volume group "mytestvg"
Creating mytestvg-pvmove0
Loading mytestvg-pvmove0 table
Resuming mytestvg-pvmove0 (253:4)
Found volume group "mytestvg"
Loading mytestvg-pvmove0 table
Resuming mytestvg-pvmove0 (253:4)
Loading mytestvg-lv1 table
Resuming mytestvg-lv1 (253:0)
Checking progress every 15 seconds
/dev/sdb: Moved: 0.6%
/dev/sdb: Moved: 1.3%
/dev/sdb: Moved: 1.8%
/dev/sdb: Moved: 2.2%
/dev/sdb: Moved: 2.7%
/dev/sdb: Moved: 3.2%
... /dev/sdb: Moved: 99.3%
/dev/sdb: Moved: 99.8%
/dev/sdb: Moved: 100.0%
Found volume group "mytestvg"
Found volume group "mytestvg"
Loading mytestvg-lv1 table
Suspending mytestvg-lv1 (253:0)
Suspending mytestvg-pvmove0 (253:4)
Found volume group "mytestvg"
Found volume group "mytestvg"
Found volume group "mytestvg"
Resuming mytestvg-pvmove0 (253:4)
Found volume group "mytestvg"
Resuming mytestvg-lv1 (253:0)
Found volume group "mytestvg"
Removing mytestvg-pvmove0 (253:4)
Found volume group "mytestvg"
Removing temporary pvmove LV
Writing out final volume group after pvmove
Creating volume group backup "/etc/lvm/backup/mytestvg" (seqno 37).
The A If you do a In the example below, # pvscan PV /dev/sdb VG mytestvg lvm2 [250.00 GB / 180.00 GB free] PV /dev/sdd1 VG mytestvg lvm2 [200.00 GB / 130.00 GB free] PV /dev/sda5 VG leviathan lvm2 [200.00 GB / 65.00 GB free] Total: 3 [650.00 GB] / in use: 3 [650.00 GB] / in no VG: 0 [0 ] When the # pvscan PV /dev/sdb VG mytestvg lvm2 [250.00 GB / 250.00 GB free] PV /dev/sdd1 VG mytestvg lvm2 [200.00 GB / 130.00 GB free] PV /dev/sda5 VG leviathan lvm2 [200.00 GB / 65.00 GB free] Total: 3 [650.00 GB] / in use: 3 [650.00 GB] / in no VG: 0 [0 ] We can now remove # vgreduce mytestvg /dev/sdb Removed "/dev/sdb" from volume group "mytestvg" # pvs PV VG Fmt Attr PSize PFree /dev/sda5 leviathan lvm2 a- 200.00G 65.00G /dev/sdb lvm2 -- 250.00G 250.00G /dev/sdd1 mytestvg lvm2 a- 200.00G 130.00G Now # pvremove /dev/sdb Labels on physical volume "/dev/sdb" successfully wiped ... and we then pull the drive. AND... we did all of this while Exporting Volume GroupsIf you want to remove disks from one machine and plug them into another without losing the data, you can use Extra Wisdom
|
