|
|
|
|
|
Linux Training 1825 Monetary Lane Suite #104 Carrollton, TX Do a presentation at NTLUG. What is the Linux Installation Project? Real companies using Linux! Not just for business anymore. Providing ready to run platforms on Linux |
OverviewSeems that everyone is talking about Single Sign On solutions. Many of the proposed solutions center around LDAP. However, most either take the approach of competing directly against Windows Active Directory, or supplanting it. Some do some sort of cooperation with it but insist on replication. Lightweight Directory Access Protocol (LDAP) is known to be very scalable, and while LDAP syntax is well understood, the schema are generally a mystery and subject to much interpretation across platform LDAP solutions especially in the area of password control. However, most companies do not require a solution that will scale into the tens of thousands of users. Most companies can live with solutions that scale into the low thousands. Network Information Service is a much simpler protocol that can derive information from the configuration on an existing host (the NIS master) instead of creating a separately managed name space for users and other network configuration data. NIS is formally known as Yellow Pages and is a simpler way of creating shared name spaces within a network for usernames, groups, mountable shares and more. However, before we can jump right into joining Windows Active Directory and Unix/Linux NIS, we must consider the overall infrastructure. Overview DiagramTBD The PlayersfbcproxyThis Linux (SUSE 10) host will house our DNS/DHCP services as well as acting as our NIS master and the location of shared home directories (NFS/Samba). Unlike most Windows networks, it is not unusual to run a plethora of services on the same host in Linux.
This machine will also server as the gateway/firewall to the internet. It's internet facing address is determined dynamically and can either come dhcp on the eth1 interface, or via USB modem (mobile phone... for traveling road shows).
w2k3This host is running a copy of Windows 2003 Small Business Server with 25 CALs. It will be using the fbcproxy as its gateway (if needed) and DNS. New users we add to the network will be added here. When needed, this host will be used for password authentication across the network.
wihtThis Linux (SUSE 9.3-64bit) box is a client which also will run a couple of additional virtual machines using VMware. Users can login using SSH key, NIS password (when available) or Windows password.
ntlugvp-xpThis is a Windows XP virtual machine joined to the Windows domain and active directory realm of THEENDLESSHOME. This guest OS is hosted on wiht. Demonstrates Windows logins and PuTTY key'd access to client Unix/Linux hosts.
sol10This is a Solaris 10 virtual machine which is part of NIS, but is NOT joined to the Windows domain. By default, logins would be done via key'd SSH.
razorThis is the 2006 NTLUG Linux Fair giveaway box. It is a client as well and is similar to wiht in that it uses both NIS and is a member of the Windows Domain. Like wiht, it contains several VMware guest OS's, including Ubuntu 5.10, Fedora Core 5 and Windows XP.
razor-vm-xpVery similar to the Windows XP on whit. Just another Windows XP SP2 client host.
fc5-vm-fedoraFedora Core 5 (beta 2) with NIS, but without joining the Windows Domain.
0-c-29-ab-e0-d8Ubuntu, but without NIS or Windows Domain support. Hostname reflects the default assignment in DNS when no hostname is provided by the DHCP client. The name is derived from the MAC address of the network interface.
Dynamic DNS/DHCPDNS OverviewAt the heart of Dynamic DNS (DDNS) will be ISC's dhcpd server and their DNS name server, BIND. Both products are free and are "reference" implementations of their respective protocols. However, both are robust enough for enterprise use. In short, DNS is a service that allows people to use a friendly name rather than an IP address to get at a network resource. For example, instead of typing Since DNS is a hierarchical database of entries, the root(s) must be universally known. From there we have what are called the Top Level Domains, TLDs (.com, .edu, .org, .net, etc.) and underneath that are zones which are delegated out to the servers which are authoritative for that zone, which in turn might have sub-zones of authority, etc. Ultimately the Fully Qualified Domain Name (FQDN) results in a successful lookup of an "A" (Address) record which contains the IP associated with the name. Doing the reverse, IP to name, is a bit more difficult since it is hard to determine the complexities of ownership for range of IP addresses. By convention, these "PTR" records are rooted in a zone called "in-addr.arpa" (a hint as to the origins of the internet). Delegating authority for these "PTR" records is not always possible and therefore you can not guarantee that there will be a corresponding "PTR" record for all "A" records.
DNS is also used to house information about the mail exchanger for a given domain. This determines where to send mail destined for a particular domain. Microsoft has also extended the semantics of DNS by including special zones to house special lookup and discovery records for a domain that are of interest in a network using Active Directory. DHCP OverviewDynamic Host Configuration Protocol, DHCP, is a way of centralizing the management and configuration of network clients. DHCP is primarily responsible for assigning a temporarily leased IP address to a client host. However, DHCP can also help assist in pointing a host to other infrastructure pieces including the default gateway, DNS servers, NIS domain, Windows name servers, etc.
DDNS ImplementationOriginally, DNS servers housed their records in the form of a manually edited database of entries. In order to add a new record, a file was edited, an entry was made, a special serial number entry was incremented and the server was sent a signal to reload the edited zone or was simply restarted. However, it is much more convenient to send a message directly to the server with a record to be inserted, updated or deleted and have the server adjust itself based on that message. This is called Dynamic DNS (DDNS). As you may have guessed, DDNS is not only useful for adding arbitrary records by message, but could also be exploited by the DHCP server to allow it to make updates to DNS automatically when a client comes onto the network. The combination of DHCP making updates directly to DNS is also called DDNS even though it is a special example of DDNS. On zone "44.168.192.in-addr.arpa" in {
type master;
file "master/44.168.192.in-addr.arpa";
};
zone "theendlesshome.com" in {
type master;
file "master/theendlesshome.com";
};
However, this is not really enough to support DDNS. We could simply allow for dynamic updates to these zones to come from particular IP addresses only (which is somewhat secure), but instead we are going to create a special key which will allow dynamic updates only from those who can successfully sign their messages using the special key. The type of signing key we will use is called a Transaction SIGnature, TSIG, key. You can easily create a TSIG key using a utility that comes with ISC's BIND server called dnssec-keygen -a HMAC-MD5 -b 128 -n USER FBC_UPDATER The output key FBC_UPDATER {
algorithm hmac-md5;
secret "cw4fCmKNv9GZ9ygHab2ynA==";
};
Now we will allow updates from those possessing the ability to sign using this key and we will also allow such the ability to dump all of our records in something called zone transfer (zone transfers are used by slave DNS servers to receive updates/changes from a master DNS server). zone "44.168.192.in-addr.arpa" in {
type master;
allow-update { key FBC_UPDATER; };
allow-transfer { localhost; key FBC_UPDATER; };
file "master/44.168.192.in-addr.arpa";
};
zone "theendlesshome.com" in {
type master;
allow-update { key FBC_UPDATER; };
allow-transfer { localhost; key FBC_UPDATER; };
file "master/theendlesshome.com";
};
In order to support Windows Domain Member Servers on the network, we will have to add additional zones and provide some way for those Windows hosts to make dynamic updates. Unfortunately, Windows does not support TSIG, so we will allow those updates by IP. It probably does no harm for us to allow TSIG updates to those zones as well, just in case we're forced to clean up something that Windows is not able to handle well. In all the zones we will allow acl domain-controllers { 192.168.44.33; };
zone "_udp.theendlesshome.com" in {
type master;
allow-update { key FBC_UPDATER; domain-controllers; };
allow-transfer { localhost; key FBC_UPDATER; };
file "master/_udp.theendlesshome.com";
};
zone "_msdcs.theendlesshome.com" in {
type master;
allow-update { key FBC_UPDATER; domain-controllers; };
allow-transfer { localhost; key FBC_UPDATER; };
file "master/_msdcs.theendlesshome.com";
};
zone "_sites.theendlesshome.com" in {
type master;
allow-update { key FBC_UPDATER; domain-controllers; };
allow-transfer { localhost; key FBC_UPDATER; };
file "master/_sites.theendlesshome.com";
};
zone "_tcp.theendlesshome.com" in {
type master;
allow-update { key FBC_UPDATER; domain-controllers; };
allow-transfer { localhost; key FBC_UPDATER; };
file "master/_tcp.theendlesshome.com";
};
That is the heart of the For each of the files mentioned within the zone declarations, we will need to create a starting template zone database (a text file). On a SUSE Linux box, the zone databases as well as all configuration data will end housed in Each file will be similar to the following one for @ IN SOA fbcproxy.theendlesshome.com. itqb.theendlesshome.com. (
2005010679 ; serial
10800 ; refresh (3 hours), could have said 3h
3600 ; retry (1 hour), could have said 1h
604800 ; expire (1 week), could have said 1w
86400 ; minimum (1 day). could have said 1d
)
NS fbcproxy.theendlesshome.com.
A 192.168.44.6
fbcproxy A 192.168.44.6
The The For DDNS to work, these database files and the directory they reside in must be writable by the BIND process. In our case, the DO NOT hand edit the text database files while the server is up and running. Also, if there are Just for completeness, here is the reverse PTR zone SOA and PTR entry for 44.168.192.in-addr.arpa IN SOA fbcproxy. itqb.theendlesshome.com. (
2005010631 ; serial
10800 ; refresh (3 hours)
3600 ; retry (1 hour)
604800 ; expire (1 week)
86400 ; minimum (1 day)
)
NS fbcproxy.theendlesshome.com.
6 PTR fbcproxy.theendlesshome.com.
Notice the use of If you're running SUSE, you may find it easier to let SUSE's YaST create the zone database files for you. YaST can be used to manage DNS in a non-dynamic fashion. It is not useful when using DDNS, but can be used to at least get the zone files started. DNS TestingTo test your zones, you should be able to do either DHCP ImplementationThe DHCP configuration is simpler. We simply add an additional parameter to a normal # dhcpd.conf
#
authoritative;
# This prevents clients from updating their own information, we
# will instead parse the client supplied options and make
# the selection of hostname and domainname.
deny client-updates;
# This forces the domain name here If you want different domain names for
# different clients, you can override this name in a more specific
# scope - at group, subnet, pool or even host level.
#
option domain-name-servers 192.168.44.6;
option netbios-name-servers 192.168.44.33;
option ntp-servers 192.168.44.6;
option nis-domain "fbc.nis";
option nis-servers 192.168.44.6;
ddns-domainname "theendlesshome.com";
option domain-name "theendlesshome.com";
max-lease-time 300;
default-lease-time 300;
# Generate DNS names for clients who don't provide a
# host-name... the generated names will be ASCII representations
# of the clients' MAC addresses. See notes below on variations for
# fixed-address hosts.
ddns-hostname = pick (option fqdn.hostname, option host-name,
binary-to-ascii (16, 8, "-", substring (hardware, 1, 6)));
# DDNS is still in flux, hence the term "interim". If you are using DDNS,
# this line has to be here.
ddns-update-style interim;
key FBC_UPDATER {
algorithm hmac-md5;
secret "cw4fCmKNv9GZ9ygHab2ynA==";
}
# Describe primary forward dynamic ddns zone allowing updates
zone theendlesshome.com. {
primary 192.168.44.6;
key FBC_UPDATER;
}
# Describe reverse DNS zones allowing updates
zone 44.168.192.in-addr.arpa. {
primary 192.168.44.6;
key FBC_UPDATER;
}
In Window, normally updates to DNS are done by the clients themselves. Here we specify Lastly, we need to setup a pool range. ISC's DHCP Server also supports the idea of a failover DHCP server. In that arrangement, each server administrates half of the overall pool of addresses. Our implementation will just have a single DHCP server. Here is the pool: subnet 192.168.44.0 netmask 255.255.255.0
{
option routers 192.168.44.6 ;
pool
{
deny dynamic bootp clients ;
range 192.168.44.100 192.168.44.200 ;
}
}
You can see the full file here (/etc/dhcpd.conf). NFS and Samba ServerSharing file shares or folders across a network in Unix/Linux is often done with the Network File System (NFS). On Windows, file sharing is done through SMB protocol (or CIFS). This protocol can be used from a Unix/Linux host by using a program called Samba. In our example, we need to be able to share directories both ways so that we can centralize the location of the home directories for Unix/Linux clients as well as Windows clients. NFS ImplementationCreate a new filesystem and mount it at /export/nfshome *(rw,root_squash,sync,insecure) The The NFS daemon is called NFS TestingUsing another Unix/Linux client host create a mount point and attempt to mount it there. mkdir /tmp/nfshome mount fbcproxy:/export/nfshome /tmp/nfshome ls /tmp/nfshome umount /tmp/nfshome Samba ImplementationOur Windows Domain Controller is Begin with some [global]
workgroup = THEENDLESSHOME
server string = FBC Proxy and Home Directory Server
security = DOMAIN
map to guest = Bad User
realm = theendlesshome.com
winbind trusted domains only = yes
winbind use default domain = yes
password server = *
username map = /etc/samba/smbusers
log level = 5
Security is DOMAIN because we will be joining with the [homes]
comment = Home Directories
valid users = %S
browseable = No
read only = No
inherit acls = Yes
The 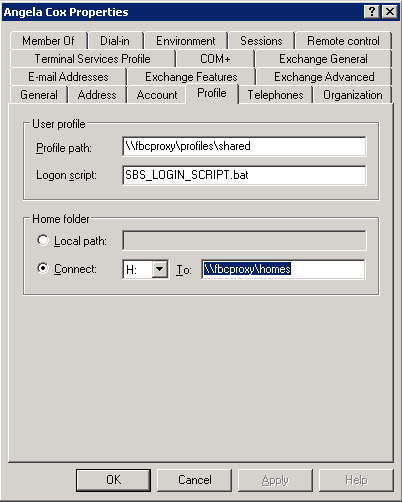 The value of Ignore the Profile Path for right now. Assuming we have started our W2K3 Domain ControllerTo be done. NISNetwork Information Service is a simple protocol that allow you to push out lookup services to remote clients. Lookups CAN include: usernames/groups, hosts and automountable shares. There is no good reason to push out hosts maps anymore with NIS since DNS is the preferred mechanism. What makes NIS so easy to use is the fact that the source of the maps being pushed out can be the NIS was originally called Yellow Pages, so you will see the NIS Server ImplementationOn Depending on the NIS implementation, you will need to locate the Locate the all: passwd group rpc services netid On some default implementations, you'll see a myriad of maps being built and pushed like: all: passwd group hosts rpc services netid protocols netgrp mail \
shadow publickey # networks ethers bootparams printcap \
amd.home auto.master auto.home auto.local passwd.adjunct \
timezone locale netmasks
We will change the maps for our use to: all: auto.home auto.master group netgrp netid passwd Sorry about the order, they are alphabetized. The The The SUSE's MINUID=5000 MINGID=6 This way we only push UIDs that are larger than 5000 and GIDs that are larger than 6. That group id may seem a bit low, but Linux requires users to have access to several system level groups in order to have enough permissions to access certain device resources (e.g. NIS Server Auto Mounter MapsThe Our /home auto.home Thus we are consuming the Our nfshome fbcproxy:/export/nfshome On a more complicated network, you can fully qualify the The To define our NIS name, we can set the fbc.nis And then manually set our domainname (on reboot this is set from the domainname fbc.nis Once we are done specifying our source maps on make There! That was not terribly hard, was it? Anytime you make a change to the source maps in Now we can start up the /etc/init.d/ypserv start /etc/init.d/yppasswd start If you know how control the execution of the init scripts on your host, you should have these start with whatever your default runlevels are. NIS Client ImplementationEach NIS Client box will need to become a part of the Name lookup resolution on a NIS Client is usually controlled with a file called The passwd: compat group: compat hosts: files lwres dns networks: files dns services: files protocols: files rpc: files ethers: files netmasks: files netgroup: nis publickey: files bootparams: files automount: files nis aliases: files In particular, lines with At the end of +:::::: At the end of +::: At the end of +:::::::: All of these lines simple mean to add the entries from the NIS maps to augment our own files. If you have not guessed, Separately, like on our passwd: files group: files hosts: files dns networks: files dns services: files protocols: files rpc: files ethers: files netmasks: files netgroup: files publickey: files bootparams: files automount: files aliases: files So while In order to bind ourselves to the fbc.nis And manually set our domain using: domainame fbc.nis If you are using Solaris or possibly other Unix hosts, you can use the ypserver 192.168.44.6 If you use the hostname in the file, realize that you will have to have a static Finally, we can start the /etc/init.d/ypbind start On Solaris 10 ( svcadm enable nis/client NIS Client Auto Mount ServiceIn order to see the NFS home directories, we need to have an automounter daemon running on NIS Client platforms. If you have made it this far, it is a simple matter of starting the daemon: /etc/init.d/autofs start On Solaris 10: svcadm enable autofs Apart from Solaris 10, you will want to add the NIS Client TestingTest to see if you are bound to the NIS domain: ypwhich See if you can pull a map manually: ypcat passwd Try to become an NIS user: su - alcox If everything worked, but the last item, the error message may indicate that there is no user directory for Joining the DomainUsing the net ads join -S w2k3 -U Administrator Using short domain name -- THEENDLESSHOME Joined 'WIHT' to realm 'THEENDLESSHOME.COM' You will need to know the id and password of any Domain Administrator (does not HAVE to be Administrator) in order to join to the Windows domain. Testing your ADS joinYou can use: net ads testjoin Join is OK To see if your host is properly joined to the Windows domain. You can also try to enumerate the users from the domain with: net user -U Administrator Administrator's password: Administrator Guest IUSR_W2K3 IWAM_W2K3 SUPPORT_388945a0 krbtgt Mobile User Tmpl User Tmpl Power User Tmpl Administrator Tmpl SBS Backup User SBS STS Worker DC66C7D7-DE99-4643-8 ccox alcox If you get back a list of user defined on the domain, then you are probably ready good to go! Using Domain PasswordsIt is possible to use the Windows domain password instead of the NIS or /etc/shadow password on a given host. As long as there exists a mapping for the Windows username to the Unix/Linux/NIS username, you can use Install the THEENDLESSHOME,W2K3,W2K3 This will tell the /etc/init.d/pamsmbd start Again, you will want to add this to automatically start for your default runlevels. On SUSE, we will place our auth required pam_env.so auth sufficient pam_unix2.so auth required pam_smb_auth.so debug cachetime=20 use_first_pass After this change is made, you should be able to log into this host using your Windows password OR your local or NIS password. You may notice a longer delay when logging in since both the local/NIS and Windows systems will be checked. Creating Users AutomaticallySo... .we now have two independent user databases. The NIS maps, and the Windows Domain. We have shown that the two areas can be associated with each other allowing us to blur the lines with regards to password authentication. However, what we truly desire is a system that will allow us to create a user ONCE on one system and have it immediately available throughout the entire network. Samba provides a means by which a program can be invoked on a samba server whenever a request is made from a client and there is NO local user on the samba server host. The option in samba is called The downside is that for this to work, the user must login from a Windows client of the Windows Domain. If this does not apply to a user (a user that never uses Windows), then you can create the user normally and do a normal NIS push. But that does mean that there could be a difference between the users defined on the Windows domain and those defined strictly in NIS. I would recommend that the Windows Domain administrator perform a Windows based login on behalf of the user to force the creation on his/her behalf. Ideally, when we are totally done with all of this, we will have a system where if a user exists on the Windows Domain, they can log in, if not, they cannot log in. The goal is to centralize the management of users. Since Windows is a curse we live with and since Windows is not friendly towards non-Windows OS's, it makes sense to let Windows own the master source of usernames on the network and allow Unix/Linux to integrate with it. Inside of the add user script = /usr/local/sbin/nis_add_user I
Then we will create the
username="$1"
ip="$2"
pid=$$

logger -p auth.warning -t nis_add_user "IP [$ip] requested add user [$username]"
rm -f /tmp/nis_add_user.$pid
useradd -m "$username" &&
        echo "${username}:OkBadPassword" >/tmp/nis_add_user.$pid &&
        chpasswd -c des -e /tmp/nis_add_user.$pid &&
        usermod -d /home/nfshome/${username} ${username} &&
        (cd /var/yp;make)

rc=$?
logger -p auth.warning -t nis_add_user "IP [$ip] added user [$username]"
rm -f /tmp/nis_add_user.$pid
exit $?
In short, this will create the user, change their home directory to use the auto mounted version of the home directory and change their encrypted password string to When complete, we should be able to create a new user on the Windows Domain, log in using a Windows client and verify that the user's home area is mounted under
Test Automatic User CreationA picture is worth a thousand words. Let's create a new user called On 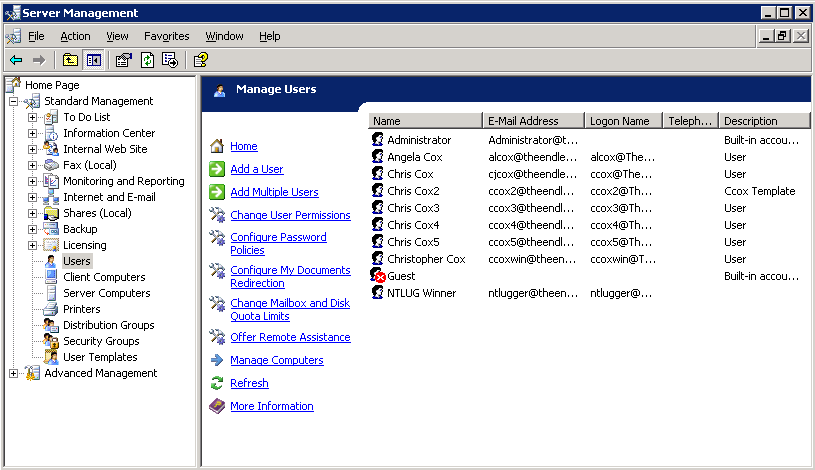 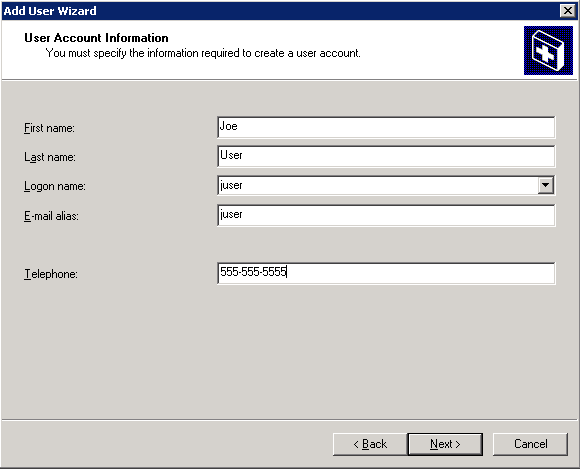 Optionally, we can use a template. Templates are pretty powerless on Windows. Has mostly to do with what groups a user is associated with. By assigning Joe User to the normal User Template, he will not be able to do too much under Windows. Microsoft has TRIED to make their system more secure, and restricting users is certainly a part of that. However, most organizations are forced to give users more liberal (powerful) group assignments because the normal User Template is so restricted. I have seen many shops put all of their user into the Administrator Template just to avoid frustration!!! 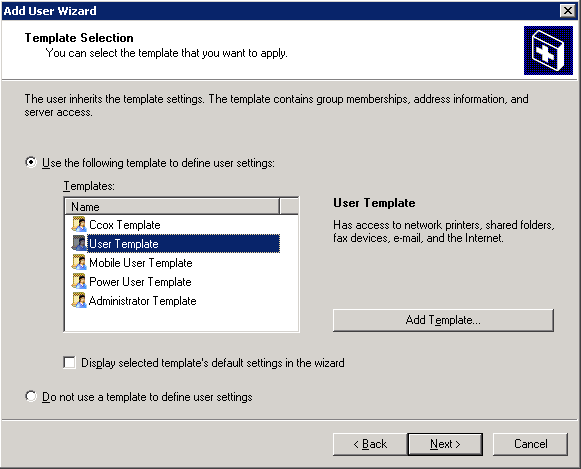 When complete we should see the account creation summary. 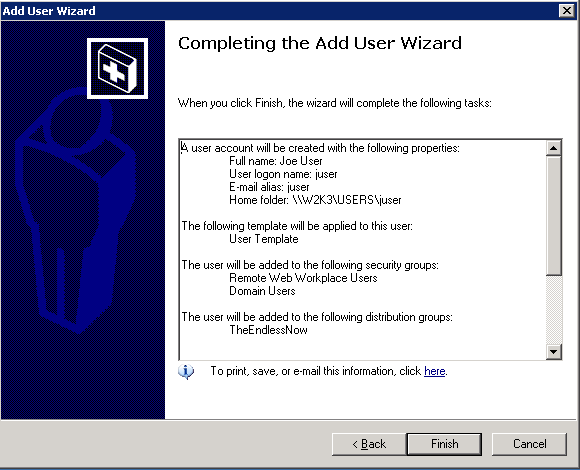 Unfortunately, the account creation wizard does not let us adjust things like the user's home directory. So after the account is created, double-click or do a Properties on the user's account and go to the Profile tab and add the mapping of 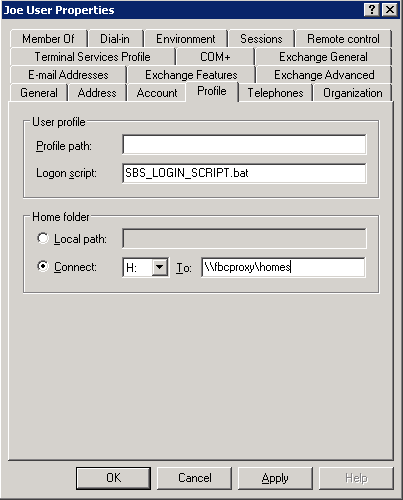 Of course, Windows does not understand the bit of Samba magic that allows each user to use Personally, I love the look on a Windows Administrator's face when they see this one! They'll usually hammer you for hours about why this could NEVER work!! Just click OK to the warning below. 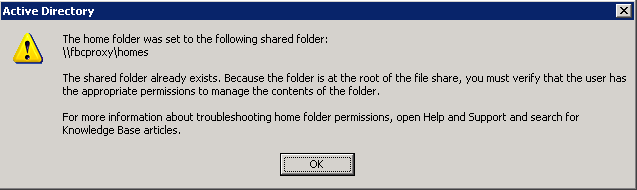 Now we are ready to login as our new user. We can do that from any Window XP client. 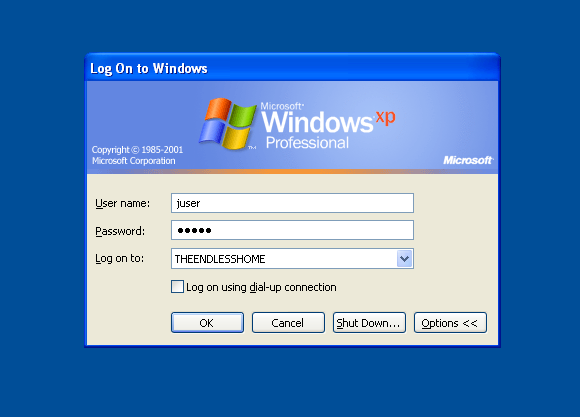 Bring up the My Computer area for Joe User and see that the 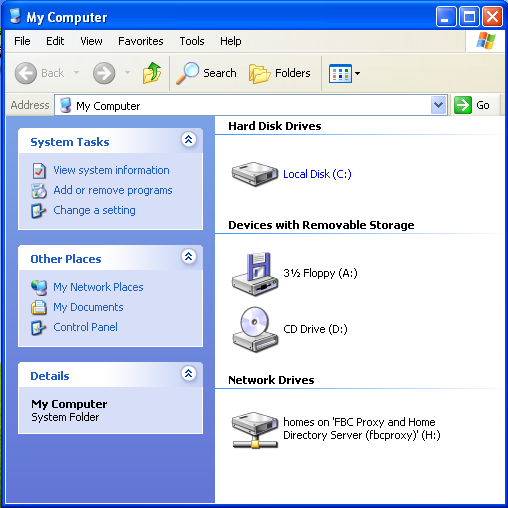 But for those who have to have extra verification. We should be able to go onto any NIS Client and view the ypcat passwd | grep juser juser:OkBadPassword:5006:5000::/home/nfshome/juser:/bin/bash Since we have a bad NIS password, on any NIS Client that also has the PuTTY and SSH KeysWow. So we have Single Sign On, right? Well, no. If we are on a Windows XP client logged in as [Sigh] That's not Single Sign On, all we've done is centralized our user account and password information. The key to Single Sign On is the use of SSH keys. The idea is to create a public and private key where the public key is stored on every server on the Unix/Linux network. Fortunately, by storing the public key into an area on the network shared home directory of the user, that means we only have to put that into place once for the entire network! The SSH private key is then used on the client host (Windows XP) as the ticket into the Linux/Unix hosts WITHOUT using a password. And that's Single Sign On. What's more is that with SSH keys in place, our Linux/Unix hosts DO NOT have to use the Install and Configure PuTTYThe easiest way to find PuTTY is by using http://www.google.com. Just search for Once PuTTY is installed, login as a regular user (e.g. 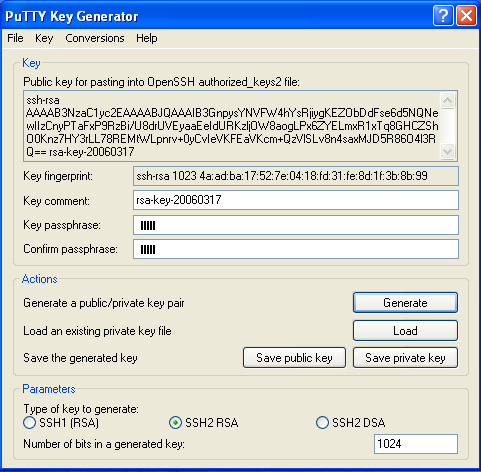 Save your private key onto your Bring up a PuTTY client. We will use that to open an SSH session to an existing NIS client host. It needs to be a host has the See the PuTTYgen window in the background, hope you didn't get rid of it. 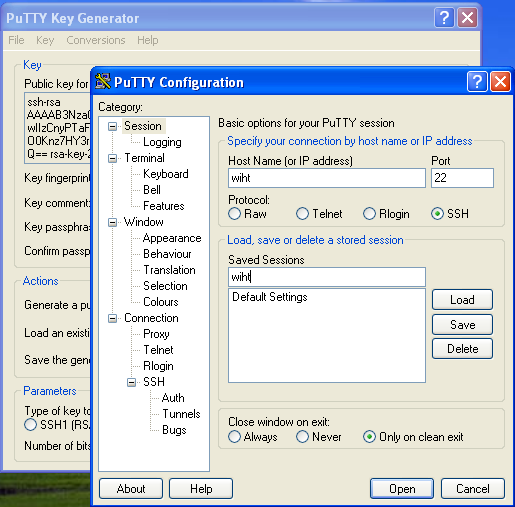 Click on the SSH area on the far left and change the SSH protocol to SSH2 before attempting to login. Go back to the Session panel and enter the name See the PuTTYgen window in the background, hope you didn't get rid of it. 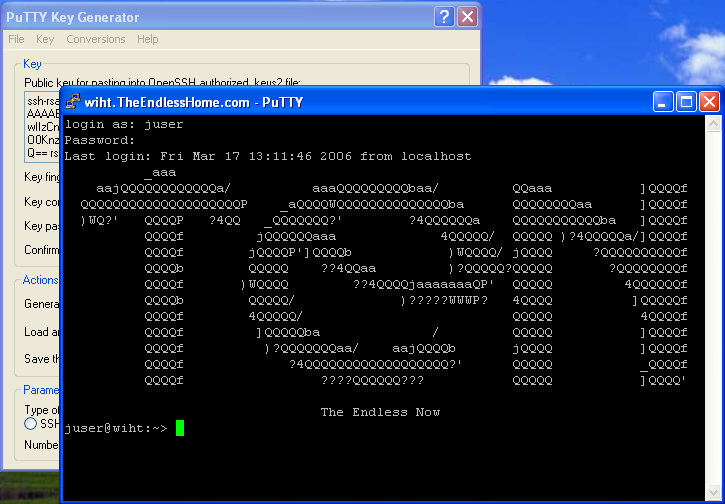 Assuming that you successfully logged in, we now need to put the OpenSSH from the PuTTYgen window into a special file in our home directory via 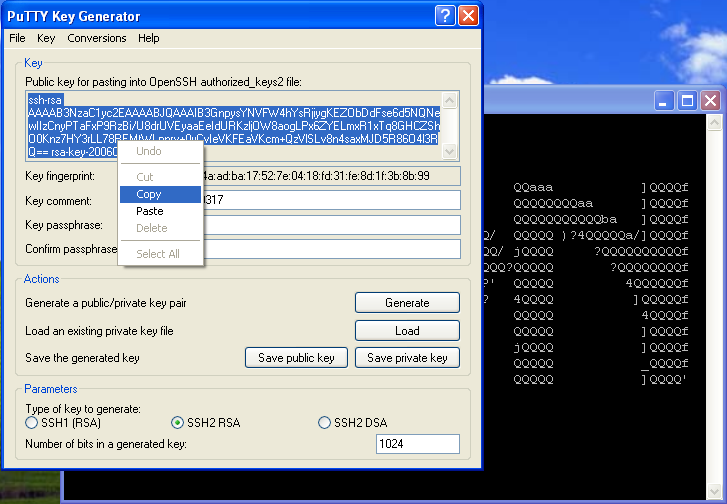 Now you will need to create an 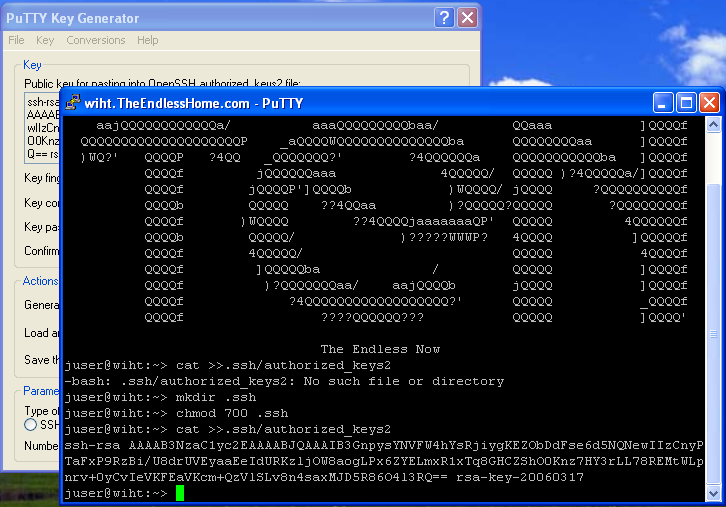 Now we can bring up the PuTTY 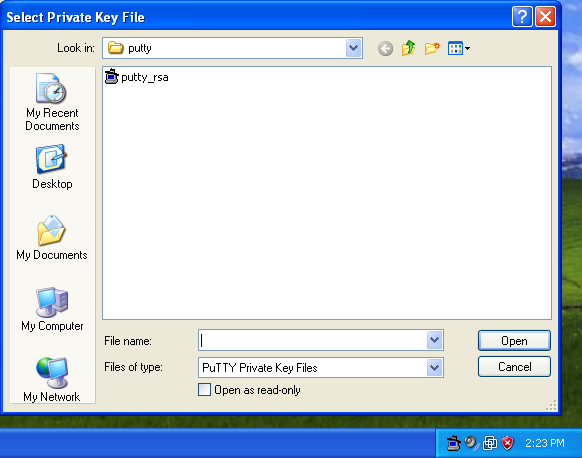 You can edit your 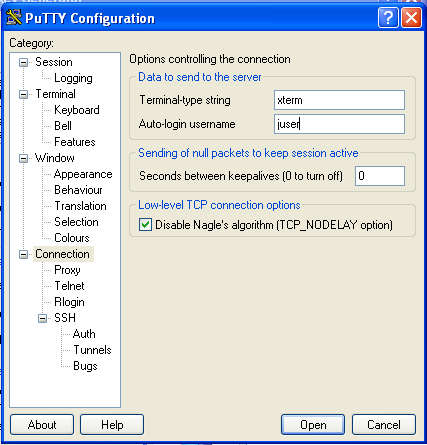 Now when you bring up your 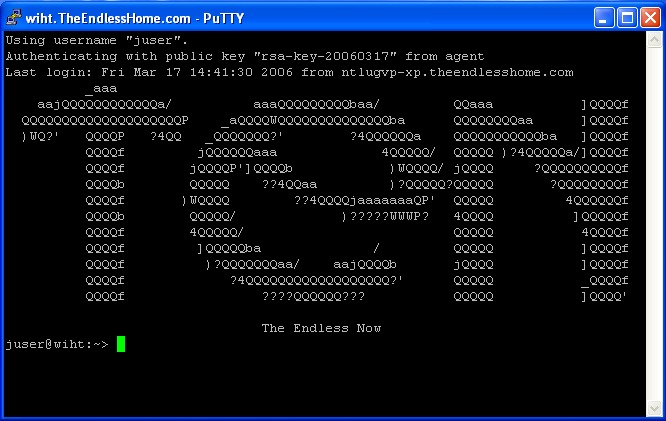 Domain Mandatory Roaming ProfileIt is possible to automate the calling of Then you can go into the You can always place a shortcut into your own local Start Up if you do not know how to setup a Mandatory Roaming Profile.  ConclusionAs complicated as this may all seem, this is not difficult to setup if you already have a fundamental understanding of NIS, SSH, NFS and some Windows Domain experience. |